As web applications grow in complexity and scale, performance has become a critical factor in delivering a smooth user experience. While JavaScript is an incredibly versatile language that powers the majority of web applications, it can struggle with computation-heavy tasks, especially in frontend development. This is where WebAssembly (WASM) steps in as a game-changing technology.
WASM is a low-level binary format that runs in modern browsers, allowing developers to execute code written in languages like C, C++, and Rust at near-native speed. This opens up a new world of possibilities, enabling high-performance tasks that would otherwise be challenging to achieve with JavaScript alone.
While there are alternative approaches for offloading heavy tasks in the browser, such as WebWorkers for parallel processing or WebGL/WebGPU for GPU-accelerated rendering, WASM offers a unique advantage in terms of ease of integration and near-native performance for certain workloads. In this article, we will focus on how developers can use WASM in frontend projects to optimize performance for tasks. Specifically, we will build a small application that leverages Rust and WASM to apply an edge detection filter to user-provided images, showing just how easy it can be to tap into the power of WASM for computation-heavy tasks.
By integrating WASM, you can unlock new levels of performance and efficiency without sacrificing the flexibility and accessibility of the web. So, let’s dive in and see how you can get started with WASM to supercharge your web applications.
Prerequisites
To keep things straightforward, we’ll stick with the essentials: a simple HTML/JS/CSS frontend, and Rust as our language of choice for the WebAssembly portion.
Here’s what we will need to get started:
- Node.js – The backbone of modern web development, for running your frontend and managing dependencies.
- Rust toolchain – Rust is our language of choice for building high-performance WASM code. The Rust toolchain will help you compile and manage your Rust projects.
- wasm-pack – This tool is crucial for building and packaging your Rust-generated WASM modules, making it easy to integrate them into your web app.
Project Setup
To kick things off, let’s create a new Rust project:
$ cargo new <project-name> --lib
$ cd <project-name>
Now, we need to tweak the Cargo.toml file to include wasm-bindgen as a dependency and explicitly set the crate type to cdylib. This will ensure that Rust compiles into a format that works seamlessly with WebAssembly. Your Cargo.toml should look like this:
[package]
name = "<project-name>"
version = "0.1.0"
edition = "2024"

[lib]
crate-type = ["cdylib"]

[dependencies]
wasm-bindgen = "0.2"
Implementing Sobel Edge Detection with Rust and WebAssembly
The edge detection pipeline consists of two major steps: first, we will convert the image to grayscale, and then we will apply the Sobel edge detection algorithm. The Sobel method is a well-known technique in image processing due to its simplicity and effectiveness in detecting edges.
Step 1: Grayscale Conversion
To begin, we need to convert the image to grayscale. The process is fairly straightforward: we loop through every pixel in the image (in RGBA format) and calculate the grayscale value based on the red, green, and blue channels. For this demonstration, we will use the popular Luminosity method for grayscaling, which is known to give more perceptually accurate results compared to simpler averaging methods.
Here is the Rust code implementing the grayscale filter:
use wasm_bindgen::prelude::*;

#[wasm_bindgen]
pub fn grayscale(image_data: Vec<u8>) -> Vec<u8> {
    let mut buffer = Vec::with_capacity(image_data.len());

    // Process each pixel (RGBA)
    for i in (0..image_data.len()).step_by(4) {
        let r = image_data[i] as f32;
        let g = image_data[i + 1] as f32;
        let b = image_data[i + 2] as f32;
        let a = image_data[i + 3] as u8;

        // We use the `luminosity` grayscaling method
        let gray = (0.299 * r + 0.587 * g + 0.114 * b) as u8;

        buffer.push(gray);
        buffer.push(gray);
        buffer.push(gray);
        buffer.push(a);
    }

    buffer
}
In this function, we iterate through the RGBA data of the image, compute the grayscale value using the luminosity formula, and construct a new RGBA image where we replace each pixel’s color channels with the calculated grayscale value.
Step 2: Sobel Edge Detection
Now that we have a grayscaled image, we can apply the Sobel edge detection algorithm. The Sobel filter uses two kernels (one for detecting horizontal edges and one for vertical edges) to compute the gradient of pixel intensity at each position. The magnitude of this gradient indicates the strength of the edge at that point.
Here is the implementation of the Sobel edge detection function, which makes use of the grayscale function from the previous step:
#[wasm_bindgen]
pub fn sobel_edge_detection(image_data: Vec<u8>, width: usize, height: usize) -> Vec<u8> {
    let grayscaled_image_data = grayscale(image_data);

    let mut buffer = vec![0u8; grayscaled_image_data.len()];

    // Sobel kernels
    const KERNEL_X: [i32; 9] = [
       -1, 0, 1,
       -2, 0, 2,
       -1, 0, 1
    ];
    const KERNEL_Y: [i32; 9] = [
       -1, -2, -1,
        0,  0,  0,
        1,  2,  1
    ];

    // Iterate over the image pixels (excluding borders)
    for y in 1..height - 1 {
        for x in 1..width - 1 {
            let mut sum_x = 0;
            let mut sum_y = 0;

            // Apply Sobel filters
            for ky in 0..3 {
                for kx in 0..3 {
                    // Calculate the position of the current pixel in the RGBA image data
                    let pixel_index = ((y + ky - 1) * width + (x + kx - 1)) * 4;
                    let pixel_value = grayscaled_image_data[pixel_index] as i32;

                    // Apply kernel
                    sum_x += KERNEL_X[ky * 3 + kx] * pixel_value;
                    sum_y += KERNEL_Y[ky * 3 + kx] * pixel_value;
                }
            }

            // Compute the magnitude of the gradient
            let magnitude = ((sum_x.pow(2) + sum_y.pow(2)) as f64).sqrt().min(255.0) as u8;

            // Apply a threshold to enhance edges, make them black or white
            let threshold = 100; // Possible values: 0-255; 100-150 will be good for most cases
            let edge_value = if magnitude > threshold { 255 } else { 0 };

            // Write the resulting RGBA value into the buffer
            let index = (y * width + x) * 4;
            buffer[index] = edge_value;
            buffer[index + 1] = edge_value;
            buffer[index + 2] = edge_value;
            buffer[index + 3] = grayscaled_image_data[index + 3];
        }
    }

    buffer
}
In this function, we iterate through the pixels of the grayscaled image (excluding the borders), applying the Sobel kernels to compute the horizontal and vertical gradients. We then calculate the magnitude of the gradient and apply a threshold to determine whether a pixel is part of an edge. The resulting edge-detected image is returned as a new RGBA buffer.
Step 3: Compiling to WebAssembly
Once we have written the necessary Rust code, we can compile it to WebAssembly using wasm-pack. This will allow us to use the edge detection function in a web application.
To build the WASM module, simply run the following command in your terminal:
$ wasm-pack build --target webThis will generate all the necessary files and place them in a new /pkg directory. You can then import and use the WASM module in your frontend JavaScript code to perform edge detection on images.
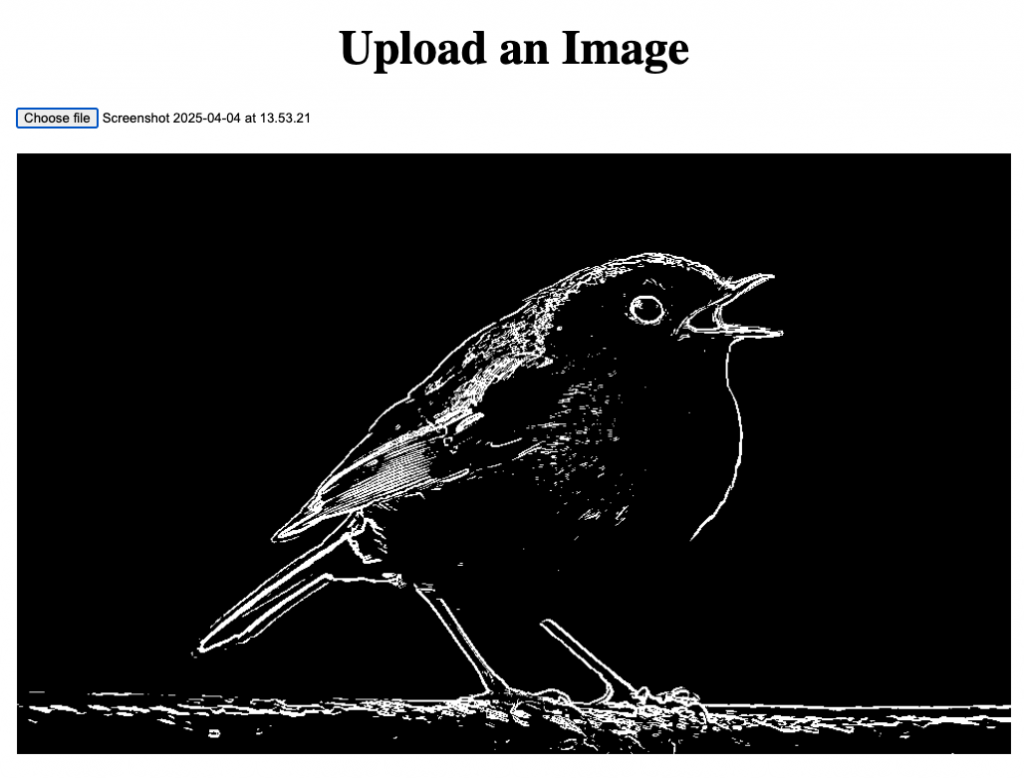
Our Web App
We will keep the web app fairly simple by using just basic HTML, CSS, and JavaScript logic, without relying on additional dependencies.
Our HTML will feature a simple file input for uploading an image and a canvas element to display the resulting image.
<!DOCTYPE html>
<html lang="en">
  <head>
    <meta charset="UTF-8" />
    <meta name="viewport" content="width=device-width, initial-scale=1.0" />
    <title>WASM Edge Detection - Demo</title>
    <link rel="stylesheet" href="style.css" />
  </head>
  <body>
    <main>
      <h1>Upload an Image</h1>
      <input type="file" id="image-upload" accept="image/png, image/jpeg" />
      <canvas id="canvas"></canvas>
    </main>

    <script src="main.mjs" type="module"></script>
  </body>
</html>
To enhance the alignment and presentation, we will add some simple CSS:
main {
  max-width: 1000px;
  margin: 0 auto;
}

h1 {
  text-align: center;
  font-size: 3rem;
}

#image-upload {
  display: block;
  margin-bottom: 24px;
  width: 100%;
}

#canvas {
  width: 100%;
}
Finally, we will implement the JavaScript logic to process the user-provided image. Using the canvas element as our image buffer, we adjust its dimensions to match the uploaded image and load its data into the buffer. After that, we pass the image data to our WASM-powered edge detection function and replace the original image buffer with the processed pixel data.
import init, { sobel_edge_detection } from "./pkg/<project-name>.js";

// Initialize WASM module
await init();

const fileUpload = document.getElementById("image-upload");
const canvas = document.getElementById("canvas");
const ctx = canvas.getContext("2d");

fileUpload.addEventListener("change", async (event) => {
  const [file] = event.target.files;

  if (!file) return;

  const reader = new FileReader();

  reader.onload = (e) => {
    const img = new Image();
    img.onload = () => {
      // Set the canvas size based on the image
      canvas.width = img.width;
      canvas.height = img.height;

      // Draw the image to the canvas
      ctx.drawImage(img, 0, 0);

      // Get the image data from the canvas
      const imageData = ctx.getImageData(0, 0, img.width, img.height);
      const imageDataArray = Array.from(imageData.data);

      // Process the image through our WASM module
      const processedImage = sobel_edge_detection(
        imageDataArray,
        img.width,
        img.height
      );

      const processedImageData = ctx.createImageData(img.width, img.height);

      for (let i = 0; i < processedImage.length; i++) {
        processedImageData.data[i] = processedImage[i];
      }

      // Put the processed image back onto the canvas
      ctx.putImageData(processedImageData, 0, 0);
    };

    img.src = e.target.result;
  };

  reader.readAsDataURL(file);
});
And that’s all we need! To test our application, we can now serve the files directly from the root of our project.
$ npx serveThis will launch a local server where you can interact with your application and see the WASM-powered edge detection in action.
Conclusion
WebAssembly (WASM) is a powerful tool that brings near-native performance to the web, making it an excellent choice for computation-heavy tasks like image processing. In this article, we’ve seen how WASM, especially when paired with Rust, can seamlessly integrate into a frontend application, providing a noticeable performance boost for tasks where JavaScript alone might struggle. Rust, with its strong performance characteristics and excellent WASM support, makes the process of leveraging WASM particularly easy and efficient.
However, as with any tool, WASM is not a one-size-fits-all solution. While it excels in performance for CPU-intensive tasks, there are alternative solutions that may be more appropriate depending on your specific use case. For instance, WebWorkers provide a great way to handle parallel tasks in JavaScript without blocking the main thread, making them ideal for background processing. WebGL and WebGPU are excellent choices for GPU-accelerated tasks like graphics rendering, where WASM might not be the best fit.
The key takeaway here is that while WASM is a fantastic addition to your frontend toolkit, you should use it thoughtfully. It’s not a silver bullet that should be overused in every project. Instead, you should employ it when you need to optimize for performance in critical areas, especially where JavaScript falls short. By combining WASM with other web technologies like WebWorkers or WebGL, you can create more efficient, high-performance web applications tailored to the needs of your users.
In the end, the right solution depends on the task at hand. By understanding the strengths and weaknesses of WASM and other web technologies, you can choose the best tool for the job and build better, faster web applications.